Product Details
-
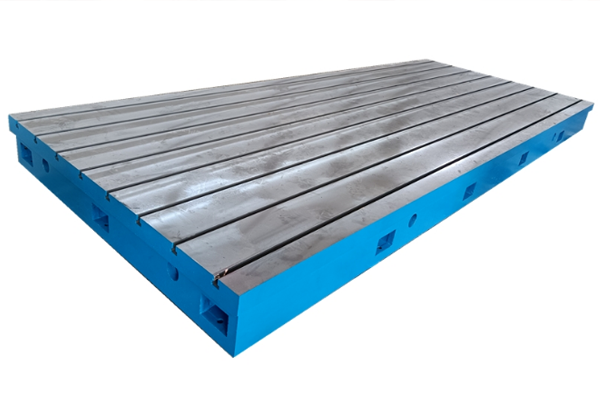
Cast iron platform flat series
-
Marble measuring tool
-
3D welding platform
-
Square box/bending plate
-
Series of cast iron flat ruler
-
V-frame series
-
Magnesium aluminum measuring tool
-
Skew instrument series
-
Plug ring gauge series
-
Machine tool pad iron series
-
Machine tool casting series
-
Counterweight iron series
-
Cast iron flooring
-
Ground rail series
-
Special wrench series
-
Other series
-
Machine tool inspection measuring tools
-
Haval Festival series
-
Valve series
-
Casting

Straight Rulrs Precision
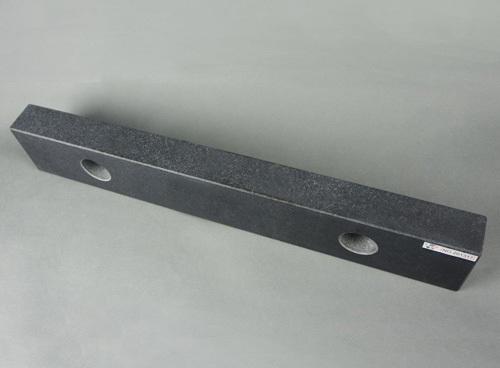
The granite ruler is made of Jinan blue,with a black luster,structure,uniform texture,good stability,and high strength,.It is a benchmark measurement tool made of stone materials,which is an ideal reference plane for the inspection of instruments,tools,and mechanical components,especially for measurement purposes.Mainly used for measuring the flatness and straightness of machine tool workbenches,guides,and working surfaces.
Performance advantages of granite rulers:
1.After long-term aging,the rock has a uniform organizational structure,coefficient of expansion,disappearance of internal stress,and no deformation.
2.Good rigidity,strong.
3.Not afraid of acid and alkali erosion,not prone to rust,does not require oil,is not prone to sticking fine dust,maintenance is convenient and simple,and has a long service life.
4.There will be no scratches,not hindered by constant temperature conditions,and the temperature measurement accuracy can be maintained at room temperature.
5.Non magnetized,able to move smoothly during measurement,without any stagnation,unaffected by moisture,and with good flatness.
Introduction to the detection method for straightness of granite rulers:
1.Ratio of contact area of parallel rulers
Apply a display agent to the working surface of the inspected ruler,and grind it onto a cast iron flat plate or ruler with an accuracy not lower than its own,showing obvious contact points on the working surface of the inspected ruler.Then,use a transparent thin plate(such as a glass plate)with 200 small squares of 2.5mm x 2.5mm engraved within the range of 50mm x 25mm,and place it at any position on the working surface of the inspected ruler.Observe the proportion of the area containing contact points in each square in sequence(in units of 1/10).Calculate the sum of the above proportions and divide by 2 to obtain the ratio of the contact area of the tested area.
2.Verticality of the side of the ruler to the working surface
Place a granite ruler on a flat plate,so that the dial holder equipped with a dial gauge with a division value of 0.001mm passes through a standard round rod and is zeroed on a standard right angle ruler.Then,in the same way,place the dial gauge seat against one side of the ruler,and the reading of the dial gauge is the verticality error of that side.Similarly,detect the verticality error on the other side and take the larger error value.
3.Parallel rulers are supported with equal height blocks at a standard support mark of 2L/9 from both ends of the ruler.According to the length of the working surface of the ruler,appropriate detection bridge slabs are selected(generally 8-10 steps,with spans between 50-500mm);Then place the bridge deck at one end of the ruler and fix the reflector or level on the bridge deck;The bridge deck is gradually moved from one end of the flat ruler to the other end according to the span,and for each span moved,a reading of the position is taken from an autocollimator with a division value of 1"(or 0.005mm/m)or an electronic level with a division value of 0.001mm/m(a combined image level with a division value of 0.01mm/m can be used for first level flat rulers with a working surface length greater than 500mm,and a frame level with a division value of 0.02mm/m can be used for second level rulers);The difference between its large and small values is the straightness error of the straightedge working surface.
 NEWS
NEWS
-
The main function of welding platforms
2022-09-08 05:40:39
-
Measures for maintenance and upkeep of the marking platform
2022-09-08 05:39:16
-
Reference plane inspection and application of cast iron platforms
2021-01-24 11:20:22
-
The centralized method and measurement inspection method for installing cast iro
2021-01-20 09:21:17
-
How to Reasonably Design Reinforced Ribs for Cast Iron Platforms
2021-01-19 09:51:22
 CONTACT
—— E-mail:326673342@qq.com
—— Tel/Fax:+86-0317-8383389
—— Phone:+86-18603177396
—— Address:Linzhuang, Haocun Town, Botou City, Hebei Province


